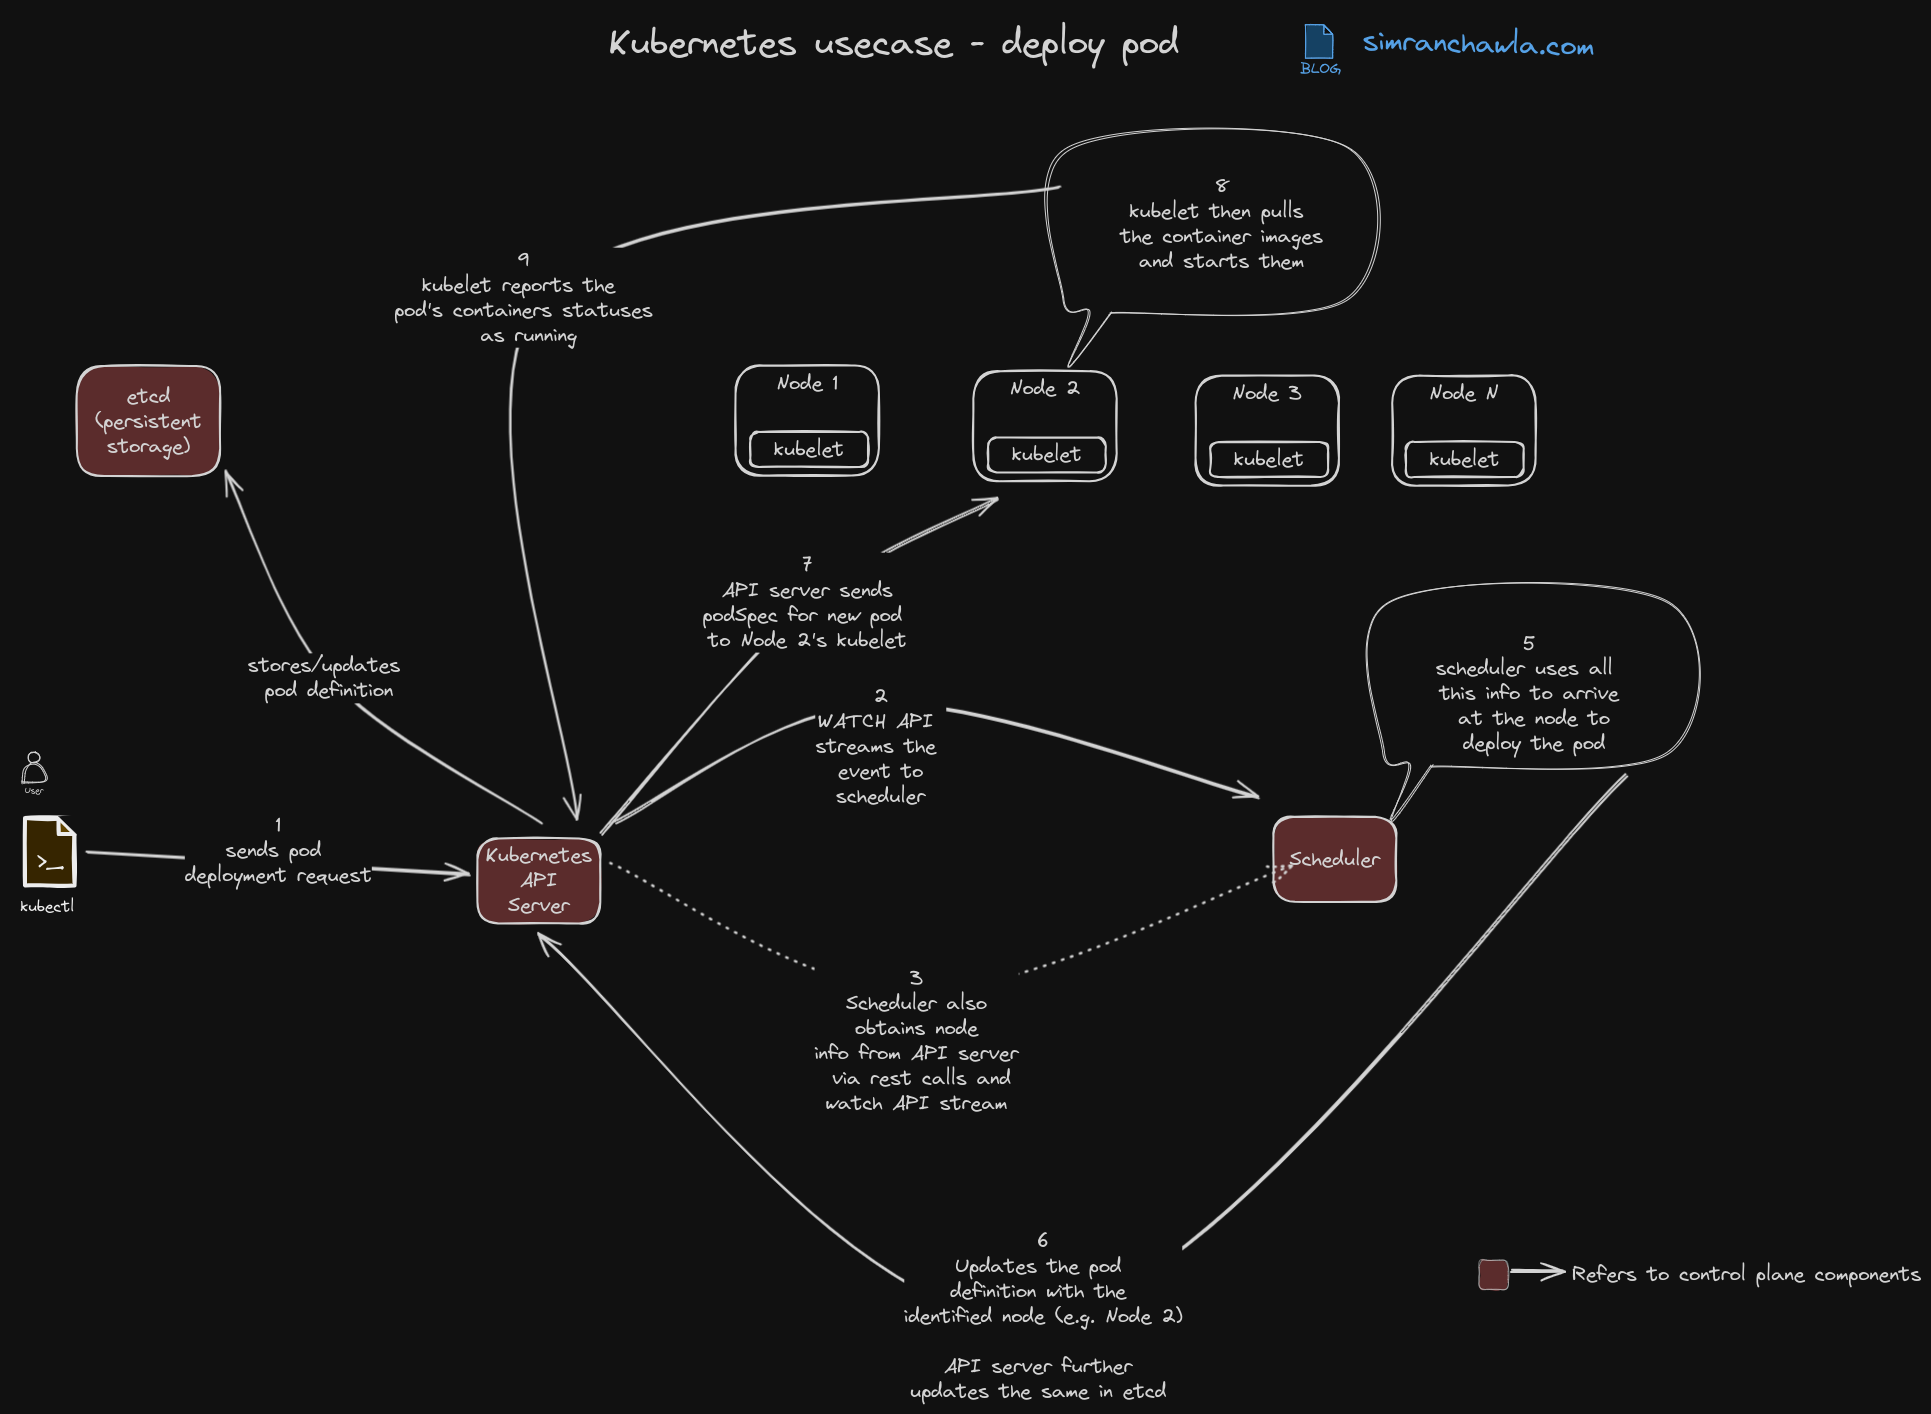
Kubernetes is a powerful container orchestration platform that automates the deployment, scaling, and management of containerized applications.
In this blog post, we’ll walk through the step-by-step process of deploying a pod in Kubernetes, diving into the interactions between the various components.
Process Overview:

1. Pod Creation Request:
- The journey begins with a user or controller submitting a pod creation request using the
kubectlcommand-line tool or the Kubernetes API. - The request includes the pod specification, defining the containers, resources, and other properties of the pod.
2. API Server Validation and Storage:
- The API server receives the request and validates it against Kubernetes syntax and rules.
- If valid, it stores the pod specification in the cluster’s data store (typically etcd).
3. Scheduler Notification:
- The API server notifies the scheduler about the new pod, responsible for finding a suitable node in the cluster to run it.
4. Node Selection:
- The scheduler filters available nodes based on criteria like:
- Resource availability (CPU, memory, storage)
- Node constraints (taints and tolerations)
- Pod affinity and anti-affinity rules
- Data locality
